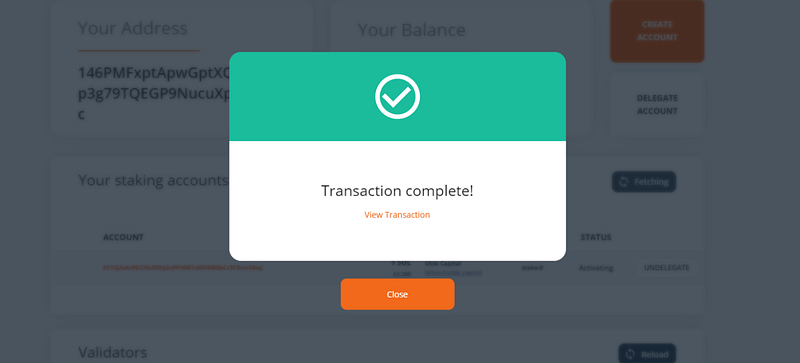
How to stake on Solana (SOL) with Ledger Nano S.
Learn how to stake SOL, the native token of the Solana Network, in this step-by-step guide. We are using the SolFare wallet together with Ledger Nano S in this guide.
SolFlare is the first digital wallet created by Dokia Capital exclusively for Solana. With SolFlare you can generate and access your free, non-custodial, digital wallet and easily stake your SOL.
At the moment of writing this article, SolFare supports 2 options to access your wallet and stake, namely:
· Using Keystore File
· Using Ledger Nano S or Ledger Nano X
This guide will focus on Staking SOL by using Ledger Nano S. We highly suggest using hardware wallets for your staking operations especially if you are holding a decent amount of SOL.
Staking your SOL via the SolFare wallet with Ledger Nano S involves three main steps:
1. Installing the Solana App on Ledger Nano S
2. Accessing your wallet in SolFare
3. Staking
If you don’t own any SOL tokens you can acquire them on Binance using the following referral link:
Step 1: Installing the Solana App on Ledger Nano S
Make sure to install the Ledger Live before you get started. You can download the application in their website.
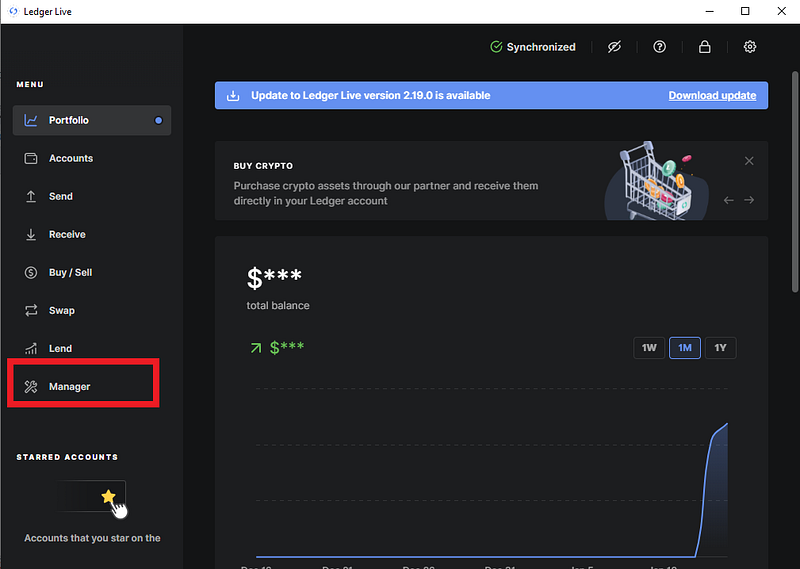
- Once you’ve successfully installed the application, open it. Input your password and go to “Manager”
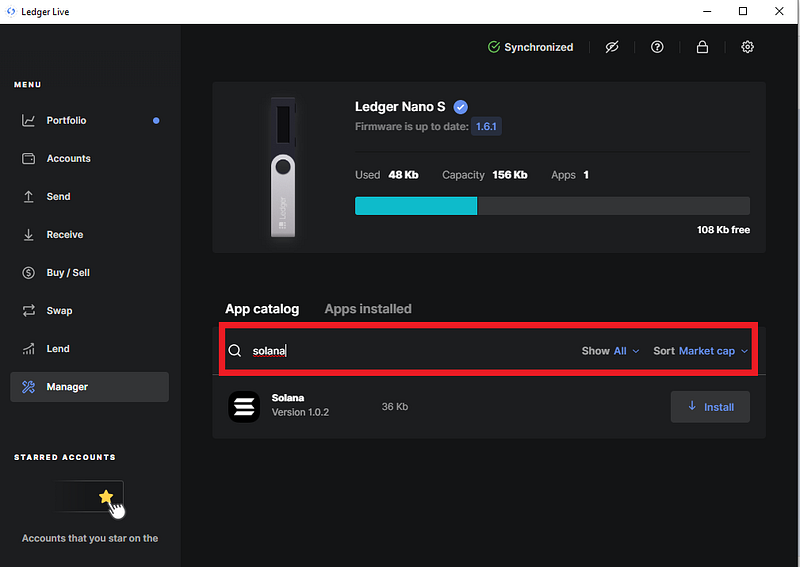
2. Once you’re in Manager, search “Solana” in the search bar.
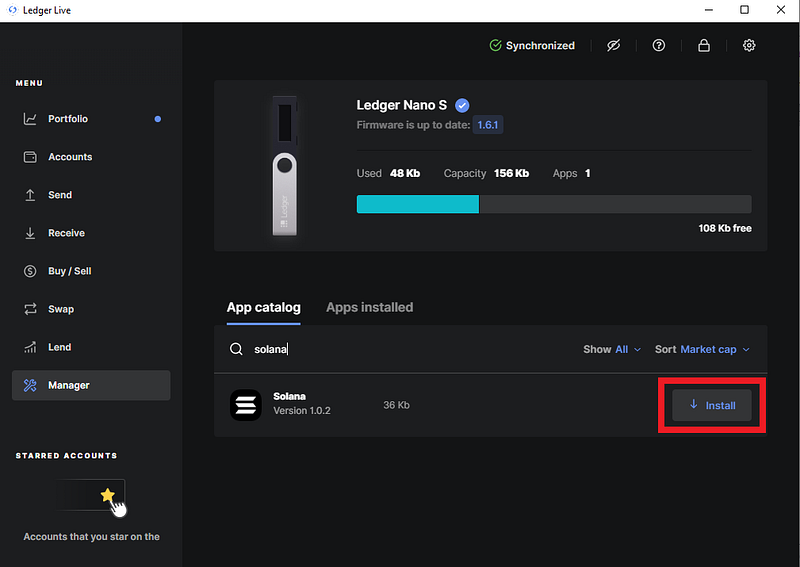
3. You should see Solana below then click “Install.”
4. Once it’s done installing, you should see “Installed.” If you see it, then you are ready for the next step.
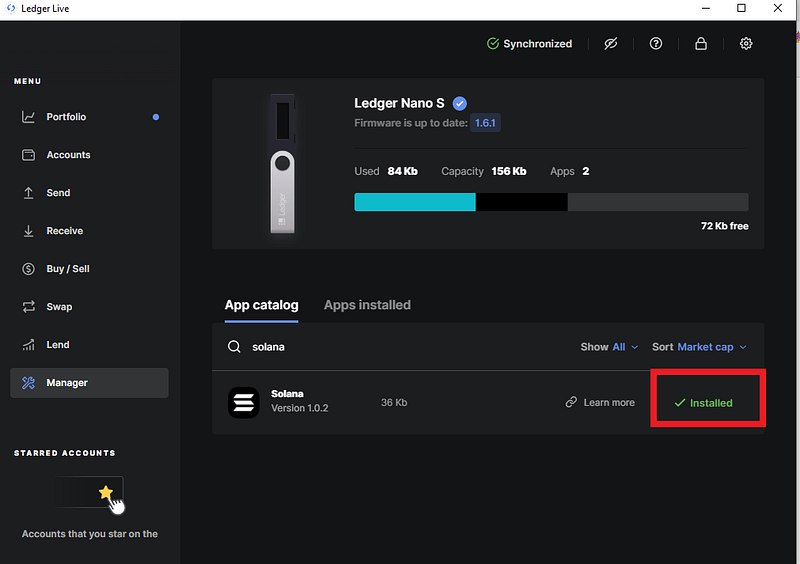
At the moment of writing the latest version of Solana application is v1.0.2. If you have an older version make sure to update it to the latest version.
Step 2: Accessing your wallet in SolFare
Once you are done with Step 1, go to https://solflare.com/
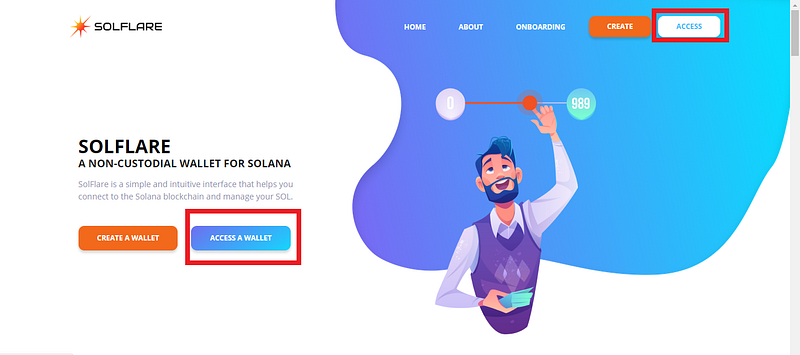
- Click on “ACCESS” on the Menu or on “ACCESS A WALLET” on the homepage.
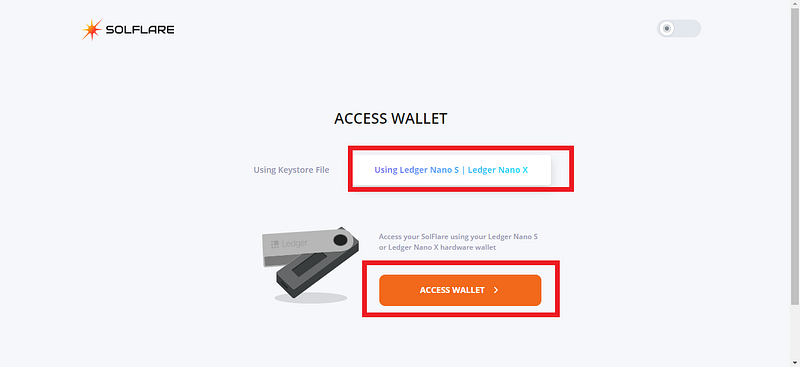
2. You will be given 2 options to access your wallet. Click on “Using Ledger Nano S | Ledger Nano X” then select “ACCESS WALLET.”
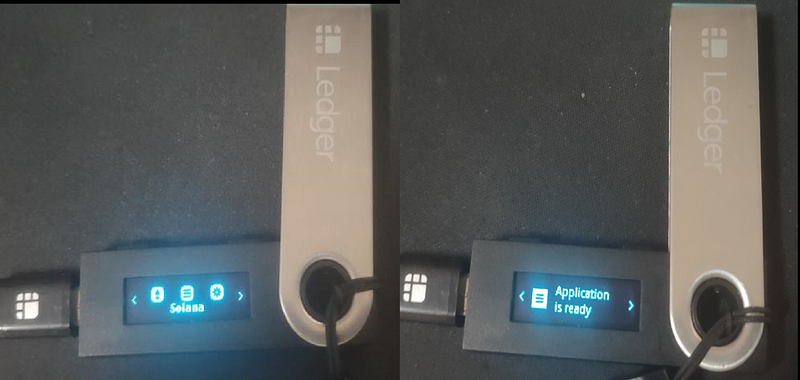
3. Before we go to the next step, select “Solana” in your Ledger Nano S by clicking both buttons simultaneously. It should say “Application is ready.”
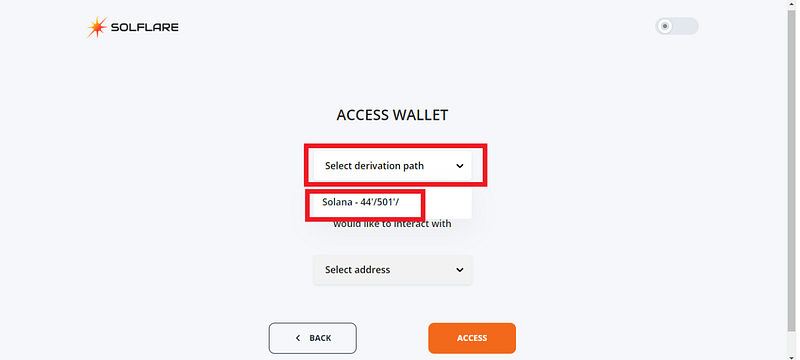
4. Once the ledger is setup, we can continue on SolFare. Select “Select Derivation Path” then select the choice “Solana — xx’/xxx’ /”.
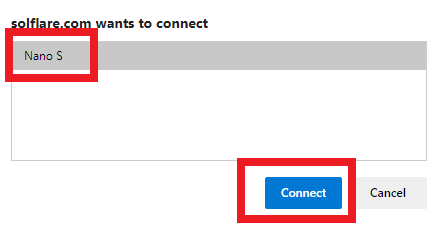
5. A pop-up will come and select “Nano S” then select “Connect.”
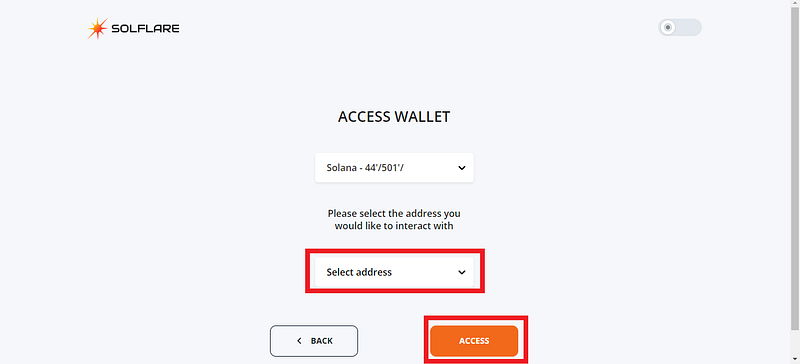
6. Once it’s done, select “Select address” and it should contain your addresses in your ledger. Select the address you want to create then select “ACCESS.”
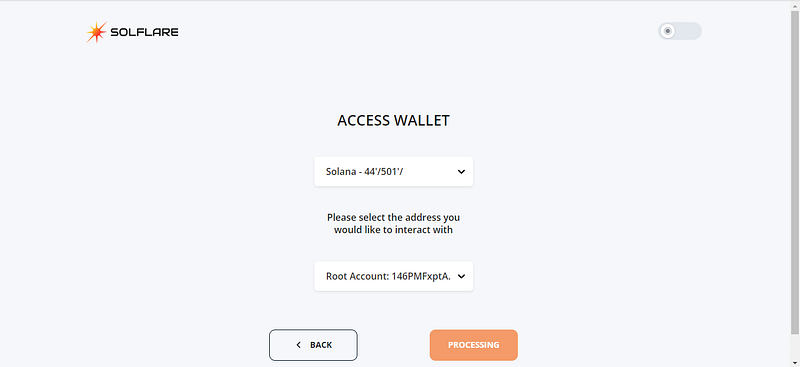
7. It should show “Processing” in the website. You need to approve the public key in your ledger
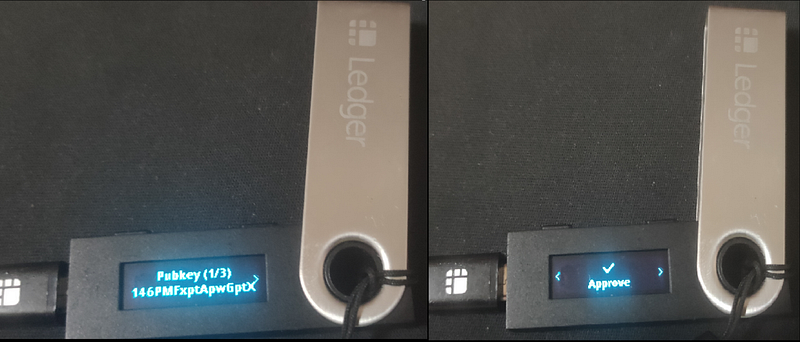
8. You will be brought to the dashboard and you are ready for the next step.
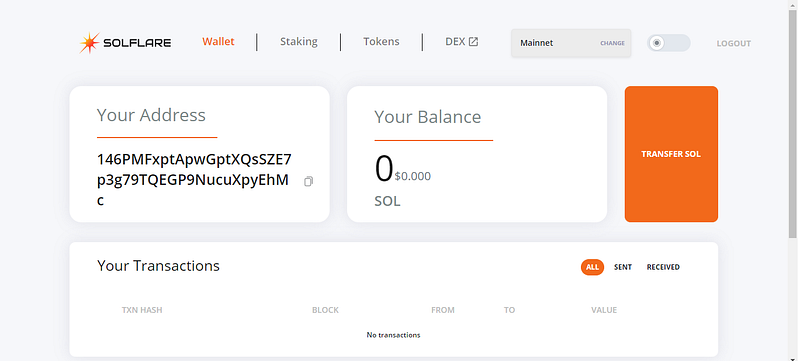
Step 3: Staking
Once you have your wallet address funded, then you are ready to stake.
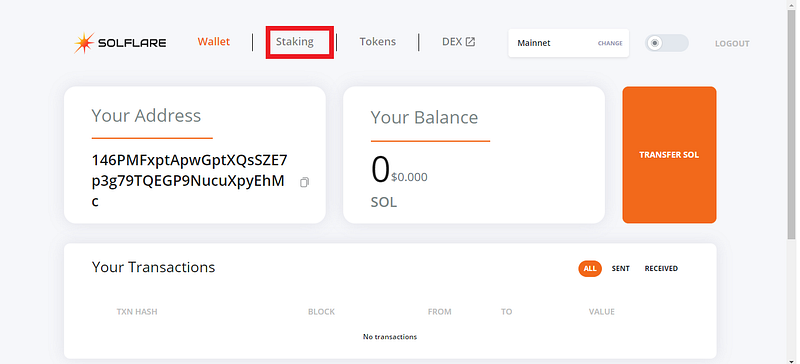
1. On your dashboard click on “Staking” in the Menu.
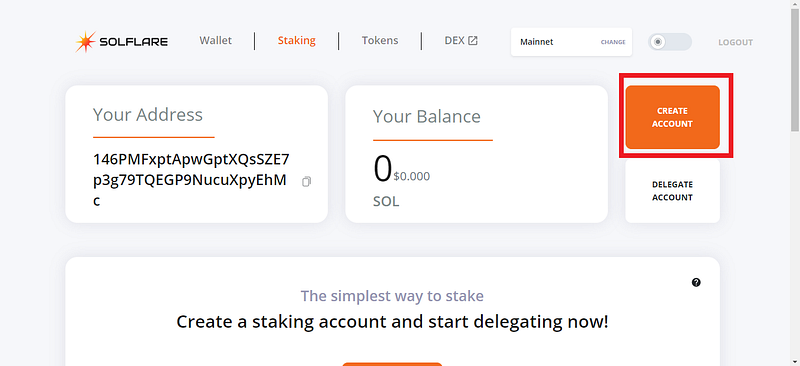
2. Click on “CREATE ACCOUNT”
3. Input amount of SOL you want to stake then select “NEXT.” Then approve the transaction in your Ledger Nano S
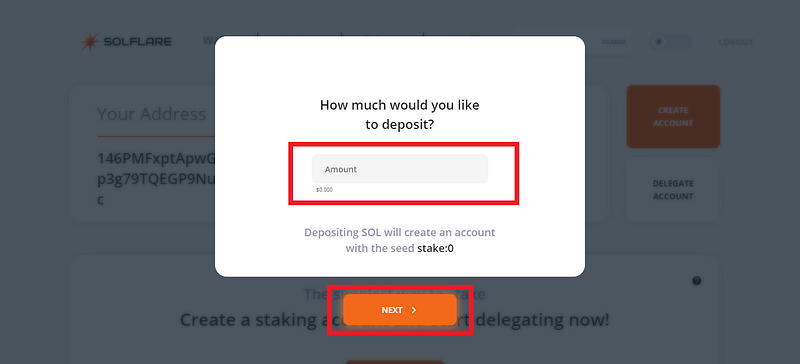
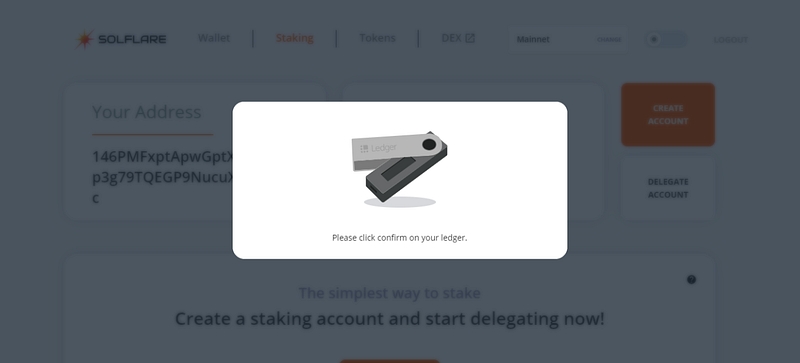
4. Once confirmed on your ledger it will take a few minutes to confirm your transaction and once it’s done it will show you this. Select “Finish” and you are ready for the last step.
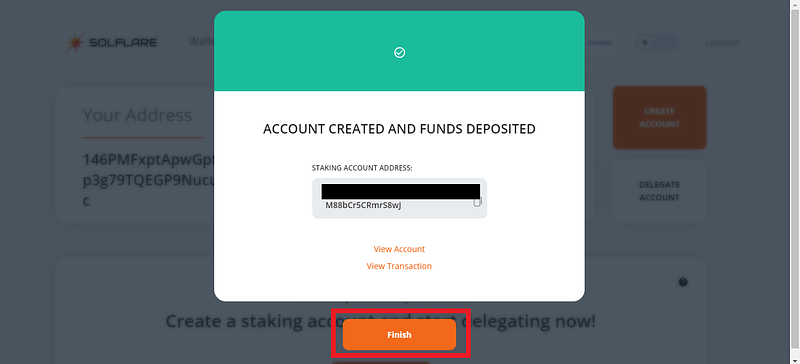
5. Once you’re account is created and funds deposited you are ready for the last step which is delegating to a validator. Click on “DELEGATE NOW.”
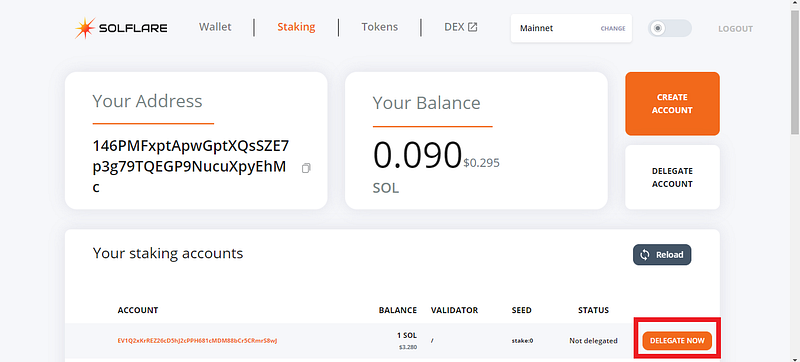
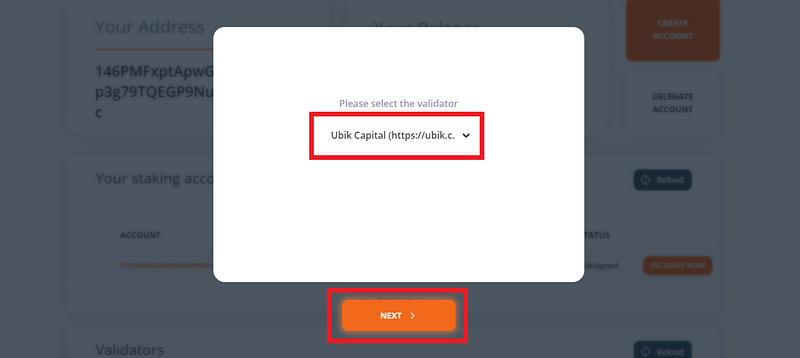
6. You will be given options to choose from multiple validators. Select your validator of choice then select “NEXT.”
7. Confirm the transaction in your Ledger Nano S. Then you’re done.
